Using Kali Linux to scan web applications on your local machine

Introduction
Having worked in the past for companies that allow long feedback and adaptation loops whilst developing and testing software, I'm no stranger to the frustration felt at having to make enormous changes due to requirements being updated at the last minute, or a feature that was written months ago getting flagged during the testing phase.
There have been a gazillion "Agile vs Waterfall" articles written by people that know far more about that sort of thing than I do, and so I'll stop short of evangelizing a particular model, but regardless of the underlying processes I still think there's a lot to be said for identifying issues as early as possible so that major headaches can be avoided later in the day.
As a web developer, it's my responsibility to write secure applications, and rather than leaving everything to the Pen Testers, it would be nice if I could catch some of the more obvious security issues myself whilst I'm developing my application. This certainly won't replace a proper penetration test, but I'm thinking that a move towards increased security awareness and software that is designed correctly from the ground up can't be a bad thing.
In this article, I'll show you how to use OWASP's ZAP (Zed Attack Proxy) (which comes bundled with Kali Linux) to test for some basic vulnerabilities in a web application that's being developed on your local machine.
Disclaimer
This isn't a "how to hack" guide. It's aimed at web developers similar to myself that like to brush up on app security a little bit.
The described environment setup is one that I've personally found useful, so I thought I would share it with others.
Goals
By the end of this article, you should be able to:
- Create a virtual machine (using VirtualBox) that will run a Kali Linux instance
- Use OWASP ZAP to scan a web application that is running on localhost of the machine that hosts VirtualBox
Prerequisites
- OSX (High Sierra)
- a VirtualBox installation (I'm using version 5.2.8)
- a web application that is running on your local development machine
- a basic knowledge of web development and web security is recommended
Get the Kali Linux image for VirtualBox
First of all, you'll need to grab yourself a copy of Kali Linux from the official downloads page.

Building the Virtual Machine
Once you have the Kali image (you'll need to extract the .ova file if it comes in an archive), it's time to spin it up as a virtual machine.

It'll probably take a few seconds for the image to be imported, but when it's done you should see your machine appear on the left-hand side of the main VirtualBox Manager window.
You should choose settings that are appropriate for your machine, but I've found the following settings to work best for me beyond the defaults:
System -> Motherboard:
    Base Memory = 12288mb

System -> Processor:
    CPUs = 2
    Execution Cap = 100%
    Enable PAE/NX = true

Display -> Screen:
    Video Memory = 128mb
    Enable 3D Acceleration = true

Network -> Adapter 1:
    Enable Network Adapter = true
    Attached to = NAT (or Bridged Adapter)

Ports -> USB:
    Enable USB Controller = true
    USB 1.1 (OHCI) Controller = true
Running Kali Linux
When all your settings are complete, select your virtual machine in the main VirtualBox Manager window, and click on the "Start" icon.
You should be presented with the GRUB Loader screen:
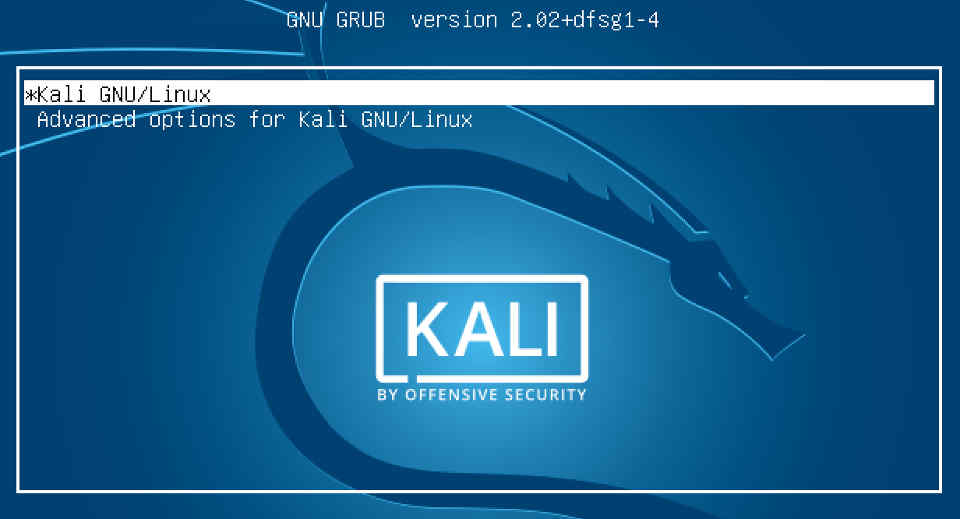
After a few seconds, you should be presented with the login screen.
The default credentials for the root account in the Kali Linux VirtualBox images are as follows, but it's worthwhile to remember that this info can also be found by selecting the Virtual Machine in VirtualBox Manager and then looking in the pane on the right-hand side:
username: root
password: toor
Accessing your Web Application from the guest machine
As mentioned in the prerequisites, you'll need a Web Application that's running on localhost (127.0.0.1) of the machine that hosts your virtual machine.
For the purposes of this article I have an application running at http://localhost:3000, but modify the following steps as necessary if your setup is different.
If you point the browser at your web application at the moment, you'll notice that it can't connect. This is because you're attempting to connect to localhost on the virtual machine (the guest) rather than localhost on your local machine (the host).
In order to proceed, we need to establish guest to host communication, which I ordinarily achieve by setting VirtualBox's network adapter to one of two different modes.
Using Bridged Adapter
Using VirtualBox's Bridged Adapter is by far the most straight forward method, but it won't work properly without being attached to a network. The guest will effectively be placed in the same network as the host, so you'll need some method of routing so that one device can see traffic from another. This has always been fine for my purposes, but it might not work so well if your machine is isolated.
The process is pretty straight forward:
hostname
Hopefully, you should see your web application in Firefox now.
Using NAT routing
If you set up your virtual machine to use NAT, then the process is slightly more complicated. One of the advantages to NAT, however, is that you don't have to rely on an external network. The guest becomes part of a separate subnet on which it can communicate with the host, with only access to the guest from outside the subnet being restricted. This might come in handy if you're out and about somewhere.
By default, VirtualBox assigns the internal ip address 10.0.2.2 to the host machine.
If all's well, you should be able to access your web application from the guest by pointing Firefox at 10.0.2.2
Intercepting traffic with OWASP ZAP
Now it's time to check that we can intercept the traffic that is sent to and from our web application.
As its name suggests, ZAP (Zed Attack Proxy) can be used to analyse responses and even make sneaky modifications to requests on their way back to the web server.
Before we can do this though, we'll need to set things up so that Firefox will route its traffic through ZAP.
After a few seconds, ZAP should start, and you'll be given the option to persist the session.
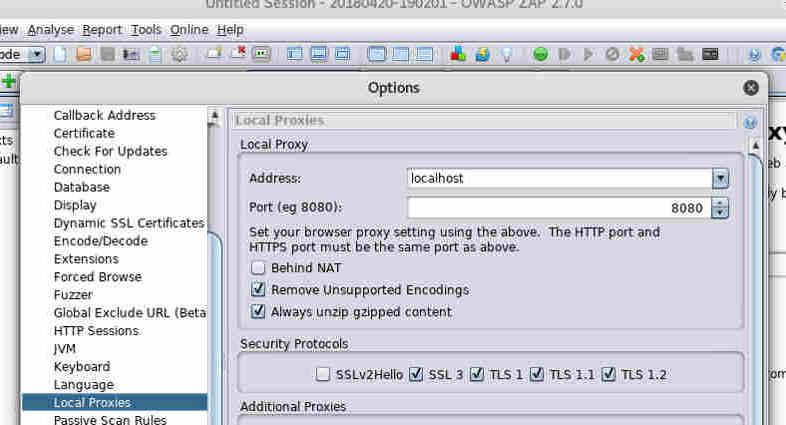
Next we need to configure Firefox.
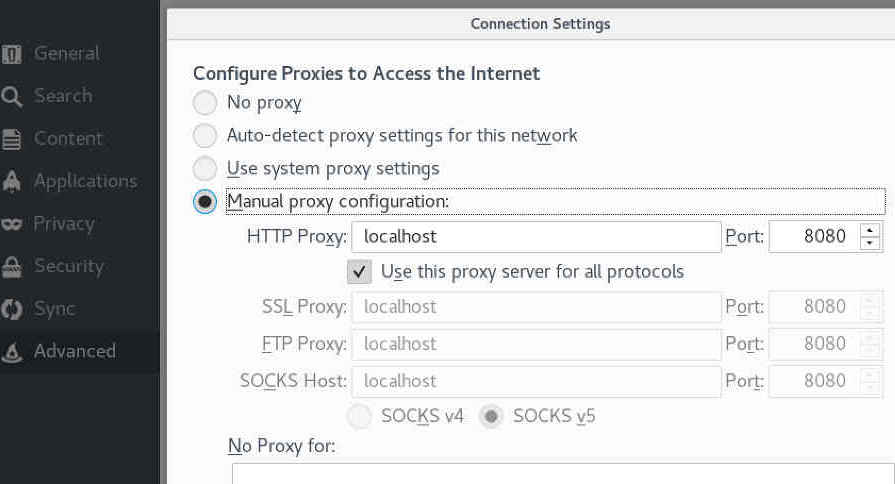
Now, let's see if we can grab some traffic from our web app.
You should see something similar to the screenshot below:

These are all the http requests and responses that occur when the web browser communicates with your web application.
If you select one of these entries, you can view the request and response information in the top-right pane (see the Request and Response tabs).

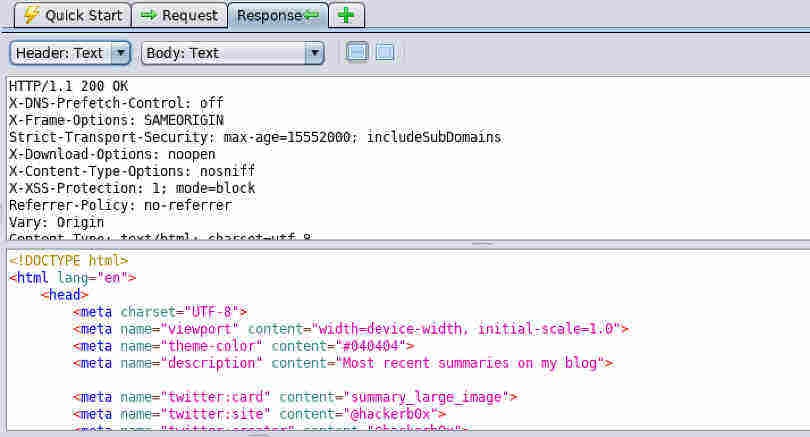
ZAP can help you perform many types of penetration test on your applications, but you'll need to read the documentation as the full capabilities of this tool extend way beyond the scope of my article. Right now though, I'm going to show you how to run a basic vulnerability scan on a specific part of your application.
You may have already noticed the scary looking Attack button in the Quick Start pane. If you type the url to your web application in the text field and then click the Attack button, ZAP will test as many pages as it can find in your app.
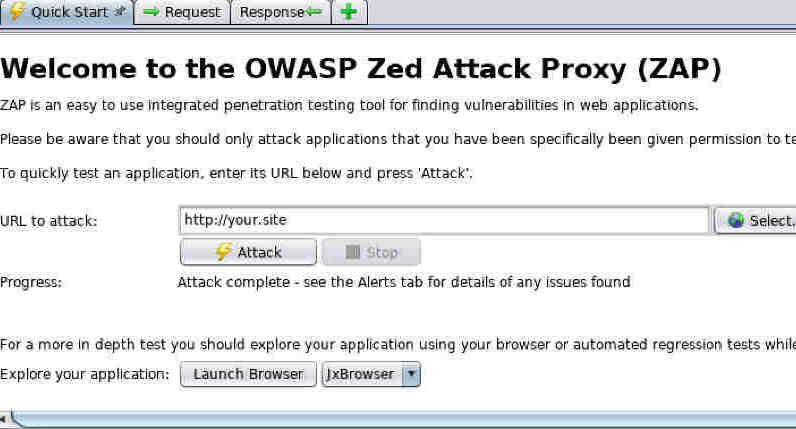
This is all very well if your application is small, or if you really want to test every single area all at once, but it's quite often useful to be able to test a specific request for vulnerabilities.
To test a specific request, navigate to the relevant area in Firefox, and then find the corresponding request in the ZAP history tab, as we saw previously.


A great number of http requests should fly past in the Active Scan pane while ZAP tests the selected part of your application for common vulnerabilities such as directory traversal, XSS and SQL Injection to name just a few.
The exact purpose of each request is beyond the scope of this article, but if you examine each of the requests and responses as described above, you should be able to get an idea of what a basic scan entails.
When the scan is complete, you can click on the Alerts tab to learn more about the vulnerabilities that have been detected (if any).
Summary
In this article we've seen how to scan a local web application using Kali Linux and OWASP's Zed Attack Proxy, running inside VirtualBox.
I've found this setup to be really useful in helping to expose and understand vulnerabilities whilst an application is still in the development stages, and hopefully you will too.
I haven't even scratched the surface on what any of the tools can really do, and I encourage you to learn as much as you possibly can about the Kali suite (and the many other tools and platforms that are available). You should also do your best to learn about the tasks that penetration testing tools perform beneath the surface rather than relying purely on automation.
I hope that someone finds this helpful :)
If you liked that article, then why not try:
Creating a bootable USB from an ISO image in OSX (High Sierra)
I have a fairly old desktop machine that I've been planning to rejuvenate with a Linux Mint installation, so in preparation I decided to create a bootable USB using one of the official ISO images. I encountered a couple of gotchas when I tried this on OSX High Sierra, so I thought I'd document my findings.